Lesson 5: Basic Pruning Techniques
Now we are ready to start talking about pruning. This lesson will cover all of the different pruning cuts and when they should be used.
This is the 5th part of a 9 lesson pruning course. If you would like to start the course from the beginning, please follow this link:
If you would like to go back to the previous lesson, follow this link:
Pruning Large Branches
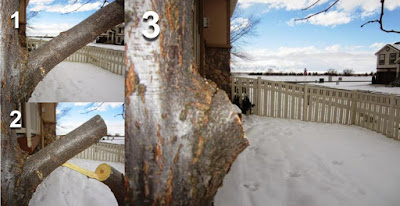
Sawing large branches should be done with the three cut method. The weight of a large branch can strip the bark below the pruning cut which is both unsightly and damaging to your tree. First, make a small cut at the bottom of the branch. Second, remove the weight of the branch. Third, remove the remaining stub.
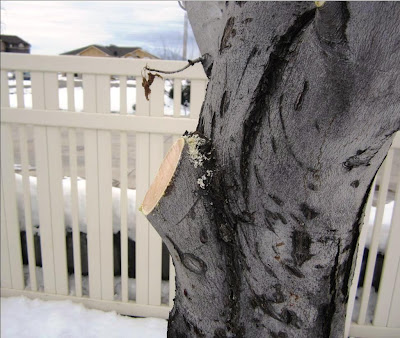
When pruning branches, make sure you are cutting the branch perpendicular to the branch being removed. This will minimize the surface area of the cut and speed up the plants ability to seal off that pruning cut.
Pruning Vertical Branches
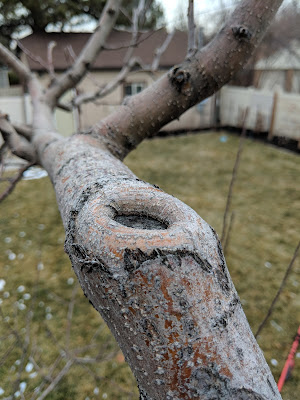
When a branch that is growing vertical is removed, you will break the rule of cutting it perpendicular to it's growth. When a pruning cut begins to seal off, it will swell on the edges. This swollen tissue will create a small dish on vertical branches, that will collect and hold water, which increases the chance for rot and other disease. When you are removing vertical branches cut them at a slight angle to shed water.
Tipping
When pruning smaller branches, make cuts at a node (bud) or fork. If you tip a branch above the node, it will die back to the nearest fork or node. When tipping branches, make the cut at a slight angle with the bud at the tip of that angled cut. This will make a smother transition when the new terminal bud begins to grow. This angled cut will also prevent damage to the new terminal bud.
You can control the direction of new growth by tipping branches at buds that are pointing in the direction that you want your tree to grow. Branches that are growing out should be tipped to start growing up, and branches that are growing up should be tipped to start growing out. This will help your tree from getting too tall and/or having over extended branches that could fail under heavy fruit loads.
Bevel Cuts
 |
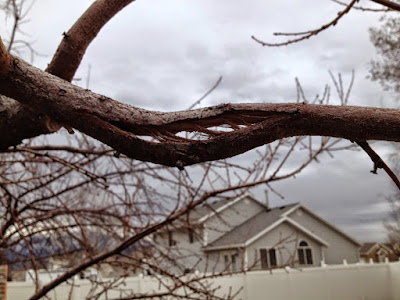
| New Branch Growing From a Bevel Cut |
Click Here to help us improve this course.


Only able to open lessons 1~5. When will the remaining lessons be available?
ReplyDeleteAll 9 lessons are now available.
DeleteI'm super new to this. I've grasped the concepts but could use more help.
ReplyDeletePruning Vertical Branches, Tipping, & Bevel Cuts: I could use a picture showing the cut angle. I love when you show a picture of the branch and you draw a line to show the cut you will make.
Thank you for the feedback! I will try to update the lesson to include this information.
DeleteA bevel cut will look more like a stub at the bottom side of the cut. This is where sleeping buds will start growing, to grow a replacement limb or fruit bud twig.
ReplyDeleteCorrect! Thank you for the clarification!
Delete